
What Is Rembrandt Lighting vs. Loop, Butterfly, and Split Lighting in Portrait Photography, and Where Should You Place the Key Light?
Walk onto a commercial portrait set or study the close-ups in a classic film, and you will notice that cinematographers classify facial lighting into four universal patterns: Butterfly (Paramount), Loop, Rembrandt, and Split lighting. You do not need four different lamps to create them. As documented in foundational studio photographic lighting theory, FilmDaft's studio lighting setup diagrams, and PhotographyTalk's portrait geometry guide, all four patterns are generated by moving a single key light along an arc from 0° (dead center in front of the nose) to 90° (directly beside the ear) while watching how the shadow of the nose interacts with the shadow of the cheek.
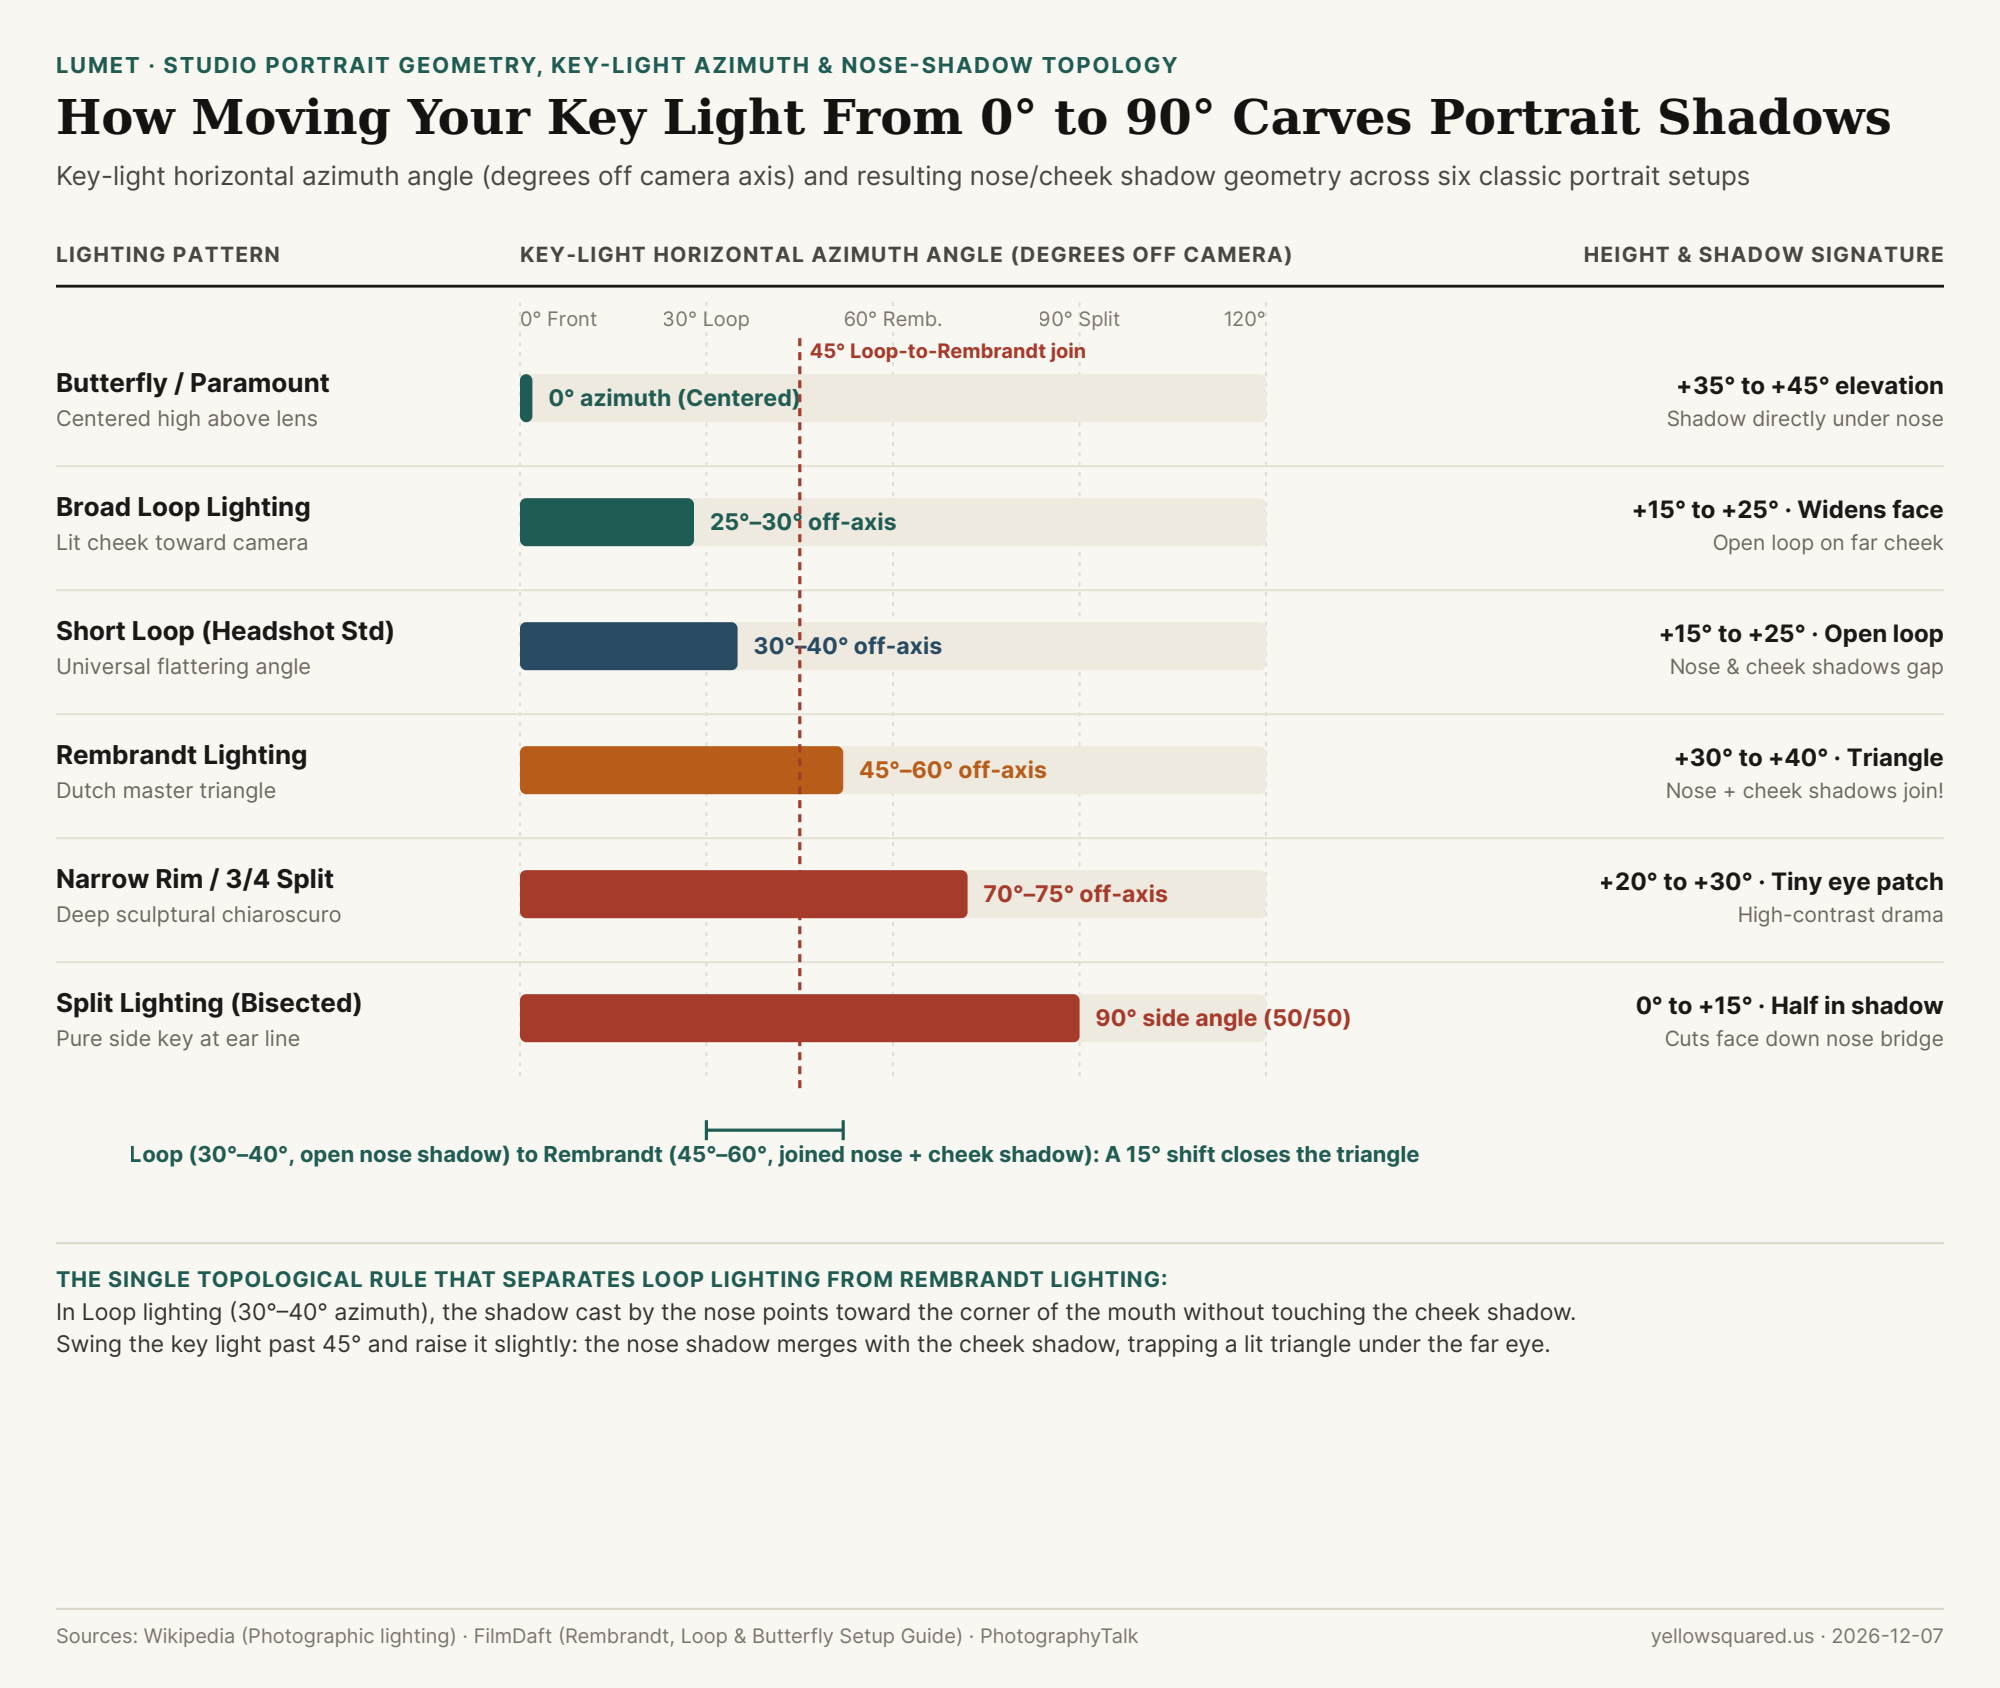
The 0° to 90° Key-Light Arc: How Nose and Cheek Shadows Define Each Pattern
When you position a key light slightly above eye level (+15° to +45° elevation) so shadows fall naturally downward, rotating the lamp horizontally around the subject's face (azimuth angle) drives a predictable topological transition (Rembrandt vs. Loop and Split lighting):
- Butterfly / Paramount Lighting (
0° Azimuth,+35° to +45° Elevation—~88%Lit Face): Positioned directly in line with the camera lens and raised high above the brow, the key light casts a symmetrical, butterfly-shaped shadow directly beneath the nose while carving out dramatic hollows under both cheekbones and the chin. Pioneered by Paramount Pictures in the 1930s for stars like Marlene Dietrich, Butterfly lighting glorifies prominent cheekbones (and converts into Clamshell lighting when a silver reflector or secondary screen fill is placed below the chin). - Loop Lighting (
25° to 40° Azimuth,+15° to +25° Elevation—~68%–78%Lit Face): Move the key light30° to 40°to one side of the camera and lower it slightly toward eye level. The nose now casts a small, rounded shadow loop diagonally down onto the shadow cheek pointing toward the corner of the mouth. Crucially, in Loop lighting, the nose shadow and the cheek shadow never touch—an open channel of light flows down the shadow cheek. Because it sculpts facial depth without heavy shadow blocks, Loop lighting is the universal default for corporate headshots, interviews, and daily video calls. - Rembrandt Lighting (
45° to 60° Azimuth,+30° to +40° Elevation—~58%Lit Face): Swing the key light wider past45°(up to60°) and raise it slightly. Suddenly, the lengthening shadow of the nose bridges the gap and merges with the shadow on the far side of the cheek, trapping an illuminated inverted triangle of light directly beneath the shadow-side eye. Named after Dutch Golden Age painter Rembrandt van Rijn (and coined on Hollywood sets by director Cecil B. DeMille in 1915), a proper Rembrandt triangle should be no wider than the eye above it and no longer than the nose—and you must ensure the key light still places a specular catchlight inside the shadow-side eye so it doesn't look lifeless. - Split Lighting (
90° Azimuth,0° to +15° Elevation—50%Lit Face): Place the key light at a full90°right angle beside the subject's ear at face height. The light bisects the face straight down the bridge of the nose, leaving one half100%illuminated and the opposite half in shadow.
"The difference between flattering Loop lighting and dramatic Rembrandt lighting is a 15-degree horizontal shift: the instant the shadow of the nose touches the shadow of the cheek, the open loop closes into the Rembrandt triangle."
Short Lighting vs. Broad Lighting: Which Side of the Face Should Face the Camera?
Whenever your key light is angled off-axis (Loop or Rembrandt), turning the subject's head slightly creates two distinct variations (PhotographyTalk):
- Short Lighting (Slimming & Sculptural — Recommended for 90% of Portraits): The subject turns slightly toward the key light, so the narrower ("short") shadow side of the face is turned toward the camera. Placing the wider cheek in shadow visually slims round or wide faces and adds immediate three-dimensional contour.
- Broad Lighting (Widening): The subject turns slightly away from the key light, so the fully illuminated ("broad") side of the face is closest to the camera lens—useful when photographing someone with a very narrow face who wants fuller facial volume.
| Lighting Pattern | Horizontal Azimuth | Vertical Elevation | Lit Face Share | Nose & Cheek Shadow Topology | Best Portrait & Video Application |
|---|---|---|---|---|---|
| Butterfly (Paramount) | 0° (On-axis) |
+35° to +45° |
~88% |
Symmetrical shadow directly under nose | Fashion glamour & high-cheekbone portraits |
| Broad Loop | 25°–30° |
+15° to +25° |
~78% |
Open nose loop; lit cheek faces camera | Adds fullness to very slim or narrow faces |
| Short Loop (Default) | 30°–40° |
+15° to +25° |
~68% |
Open nose loop; gap before cheek shadow | Universal headshot, interview & webcam standard |
| Rembrandt Lighting | 45°–60° |
+30° to +40° |
~58% |
Nose + cheek shadows join; lit eye triangle | Dramatic editorial, cinema & character portraits |
| 3/4 Chiaroscuro | 70°–75° |
+20° to +30° |
~53% |
Tiny sliver of light on far cheekbone | Low-key theatrical & moody portrait studies |
| Split Lighting | 90° (Side) |
0° to +15° |
50% |
Bisects face down nasal bridge (50/50) | Bold athletic, musician & film-noir posters |
How to Set Up Loop or Rembrandt Lighting at Your Desk
You can test all four patterns right at your desk in 30 seconds: place your phone or monitor light directly above your webcam for Butterfly, slide it 8 inches to the left or right (30°) for flattering Loop lighting, or swing it 16 inches off-center (45°+) until the shadow of your nose meets your cheek shadow to form the Rembrandt triangle. Adjust warm and daylight screen key-light presets in Lumet to dial in your exact portrait angle and color temperature.